DURKOPP ADLER 530 Betriebsanleitung
Stöbern Sie online oder laden Sie Betriebsanleitung nach Nähmaschinen DURKOPP ADLER 530 herunter. DURKOPP ADLER 530 Operating instructions [en] Benutzerhandbuch
- Seite / 98
- Inhaltsverzeichnis
- LESEZEICHEN
- CNC Knopfannähautomat 1
- CNC Automat for Button Sewing 1
- Anleitung, komplett 2
- Manual, complete 2
- Foreword 3
- General safety instructions 4
- Index Page: 5
- 1. Description of product 7
- 2. Description of proper use 8
- 3. Subclasses 8
- 4. Optional equipment 9
- 5. Stands 9
- 6. Technical data 9
- 7. Operating 11
- 7.4 Adjust thread regulator 13
- 7.8 Change needle 17
- 7.9 Button shank shaper 18
- 8.1 The control panel 20
- 8.2 User interface 22
- 8.4 Sewing patterns 25
- 8.5 Main menu 26
- X-Offset 28
- in X-direction 28
- Maschine 37
- Freie Konturen 37
- Memory-Dongle 37
- Benutzer 37
- Softstart 40
- Einrichtung 40
- Parameter 40
- Referenz.: 1 41
- Ausstattung 43
- Handtast.: Aus 45
- Laserl.: Aus 45
- Opt. Anzeige 45
- Belegung Eing 45
- Belegung Ausg 45
- Deutsch 47
- Multitest 51
- 180° - Scheibe 51
- Ereignisse 51
- = Ereignisspeicher = 62
- E4304: 3 x 62
- E8254: 1 x 62
- Temp. (°C): 30 63
- UZK (V): 325 63
- Var . + Sequ 64
- Maschinenpar 64
- Fr. Konturen 64
- Masch. kpl! 64
- Ereignissp 64
- Abst. X: 3.4 68
- Abst. Y: 3.4 68
- X10: 0.0 70
- Y10: 0.0 70
- Klasse: 530 74
- U-Klasse: 000 74
- Version: A05 74
- Datum: 100105 74
- Data Dongle 75
- Klasse: 510 75
- Fr. Kont. kpl 75
- Masch. kpl 75
- • No data saved on 79
- • Save data on the dongle 79
- 8.6 Error messages 80
- in the corresponding 81
- 9. Sewing 88
- 10. Maintenance 89
- 10.2 Oil lubrication 90
- 11. Standard sewing patterns 91
- 12. Clamping feet 94
- 13. Numbering of menu items 95
Inhaltsverzeichnis
530CNC KnopfannähautomatCNC Automat for Button SewingBedienanleitung / Operating InstructionsAufstellanleitung / Installation InstructionsServiceanlei
6.1 Technical data of the subclassesSubclass: 211Stitch type: 301Hook type: oscillating hookNeedle system: DPx17 (135x17)Needle size: [Nm] 80 - 110Nee
7. Operating7.1 Threading needle threadCaution: Danger of injury !Switch off main switch !Thread the needle thread only when the button sewing automat
7.2 Adjust needle thread tensionPretension 3With open main tension2aminorresidual stress of the needle threadis required. The residual stress is produ
7.4 Adjust thread regulatorCaution: Danger of injury !Switch off main switch !Adjust thread regulator only when the button sewing automatis switched o
7.5 Wind on bobbin thread–Put bobbin on bobbin winder 4.–Pull thread through guide 2 and around tension 1.–Wind thread counter-clockwise around the co
7.6 Change hook thread bobbinCaution: Danger of injury !Switch off main switch !Change hook thread bobbin only when button sewing automatis switched o
7.7 Adjust bobbin thread tensionCaution: Danger of injury !Switch off main switch !Adjust bobbin thread tension only when the button sewing automatis
7.8 Change needleCaution: Danger of injury !Switch off main switch !Change needle only when the button sewing automat is switched off.–Loosen screw 1.
7.9 Button shank shaperThe button clamp of the button sewing automat is equipped with abutton shank shaper 1.Swinging in/out of button shank shaper–Sw
7.10 Setting the hook feet of button clampCaution: Danger of injury !Set the button clamp while the button sewing automat is switchedon with utmost ca
Anleitung, komplettManual, complete530Alle Rechte vorbehalten.Eigentum der Dürkopp Adler AG und urheberrechtlich geschützt. Jede, auch auszugsweiseWie
8. Operating the control of class 5308.1 The control panelFor the input and output of data a control panel with an LCD displayand function keys is use
Function key FunctionIf no text field is activated:Change between the lines of the menus.The selected line is displayed white on black.If a text field
8.2 User interface8.2.1 Structure of menuSwitch onmain switchKey FService modeCode 1Sewing modeKey ESC Key ESCKey FKey P Code 1KeyProgramming mode ESC
Call up the technician mode–Switch on main switch.The control is initialized.The sewing mode menu appears on the display.–Press key “ F ”.–Enter Code
8.3.2 Selection of a parameterSome parameters offer a selection of non-modifiable adjustments.–Select the desired line with the parameter to be altere
8.4 Sewing patternsThree different sewing pattern types are available for the buttonsewing automat 530:·Specified standard sewing patterns (Type 1) (s
8.5 Main menu8.5.1 Sewing pattern operationThe parameters for the individual sewing patterns are arranged in themain menu.The sewing patterns can be a
SubmenuBehind this symbol there is a submenu.Number of stitchesBy this menu line, the needle throw distribution for standard sewingpatterns will be in
Submenu sewing pattern offsetIn this menu to it is possible to change the sewing pattern position inX-/Y-direction.When switching to this menu, the cl
Winding thread on to a bobbin:With pedal–Step pedal forwards (step 2).The sewing motor starts.–Step pedal backwards.The sewing motor stops.Via control
ForewordThis instruction manual is intended to help the user to become familiarwith the machine and take advantage of its application possibilities in
Submenu counter of daily number of pieces or counter of capacityOFFAlternative display of counter of daily number of pieces or counter ofcapacity.Both
8.5.2 Programming modeUnder this menu item the parameters for programming of sewingpatterns are arranged.With the help of the parameters shape, length
Submenu sewing pattern offsetSelect the present menu to shift the sewing pattern in X-/Y-direction.Display:present X-/Y- offset valueNumber of stitche
8.5.3 Sewing pattern sequence8.5.3.1 Switching the sequence programming mode on/offChangeover from the sewing pattern operation to the sewingpattern s
Skipping from sewing pattern sequence operation to sewingpattern operation–Actuate the function key “S” while the main menu is beingdisplayed in order
Menu items in the main menu of the sewing pattern sequenceSequenceSelection of the sewing pattern sequence.Input: 1 (2 … 25, if available)Sequence suc
8.5.3.2 Sequence programming modeIn this menu item individual sewing patterns are combined toretrievable sewing pattern sequences.Totally 25 independe
8.5.4 Technician modeIn the technician mode the following menus are included:Machine configurationsmachine configuser config.service functionsfree con
Free contoursmachine configuser config.service functionsfree contoursmemory dongleWith the automat for button sewing 530 up to nine freely defined sea
Recall technician mode–Switch on main switch.The control is initialized.The main menu appears.–Press function key “F” in the main menu.The screen for
General safety instructionsThe non-observance of the following safety instructions can cause bodily injuries or damages to the machine.1. The machine
8.5.4.1 Machine configurationparametersoft startsewing equipmenttimesParameterIn this submenu different machine parameters can be set.Soft startIn thi
Submenu machine parameterscut.rpmmax.rpmstop pos.feeding position–Select desired parameter with the keys “ñ”or“ò”.The symbol of the selected parameter
ReferencingIn this menu point the referencing mode of the step motor after thesewing process can be configurated.Input: 0 = no referencing1 = referenc
Sewing equipmentIn this submenu adjustments for the sewing equipment can be made.w.clamp f.open dimensnumberlengthwidthconfig.NoteThe entry of the cla
LengthInput of a freely selectable sewing field.Input only possible in case “free clamp dimension”had been selected. Otherwise the length / width ofth
Submenu Configurationhand switch:offlaser light: offopt. sign.assignment inputassignment outputHand switchActivating of optional hand switches. When t
Submenu TimesDelay between pedal level 1 (lowering the clamping foot) andsewing start (t1)Time only relevant with quick start via pedal or hand switch
8.5.4.2 User configurationIn this menu operation-specific adjustments are made.languagesewing modemanual keysparam.modforced stpattern lockingsequence
Operating mode push button (optional)Selection of the push button mode.This menu item is only available if the “hand switch” option in the menuconfigu
Lock sewing patternIn this submenu individual sewing patterns can be released or lockedfor selection in the sewing mode.lock allunlock allonononononon
Index Page:Preface and general safety hintsPart 1: Operating Instructions Class 530(Edition 06/2008)1. Description of product ...
Lock sequencesIn this submenu individual sequences can be released or locked forselection in the sewing mode.lock allunlock allononIn general the foll
8.5.4.3 Service functionsThe service functions allow the quick verification of all hardwarecomponents.NoteThe service menu can also be reached directl
DAC IIImultitest180°-disceventsDAC IIIINITIn this menu are indicated the different parameters of the control unit.Initializationmultitest180°-disceven
MultitestSelection of the submenu of Multitestoutput testPWM-output testinput testauto input tstmotor teststep.motor tstRAM testEEPROM testCaution: Da
Output testWith this test function the function of the output elements is checked.–Start the test function with the “OK”key.–Select desired output ele
PWM Output testThis test function checks the function of the magnets.–Start the test function by pressing the “OK”key.–Select the desired output eleme
Input testWith this test function the input element to be tested is selected.ATTENTION !The input elements have been carefully adjusted in the factory
Auto-Input testWith this test function the function of the input elements is checked.–Start test function with the “OK”key.–Actuate desired input elem
Sewing motor testWith this test function the sewing motor can be checked.–Start test function with the “OK”key.–Start motor with the key “ñ”.–Alter sp
Step motor testWith this test function the step motors and the pertaining referenceswitches can be checked.ATTENTION ! Risk of breakage !Before the te
Index Page:8.5.2 Programmingmode... 298.5.3 Sewing pattern sequences ...
RAM testWith this test function the main memory (SRAM and program datamemory) is checked.–Start test function with the “OK”key.The display shows the t
EEPROM testThis test function checks the read memory (ROM) of themicro-processor.–Start test function with the key “OK”.The display shows the followin
60EventsIn case of failure the menu can give important hints regarding thecause of the malfunction.event memorylatest eventsEvent memory(example)In th
DAC IIISelection of the submenu for the display of the DAC III parameters.TemperatureHere the current inside temperature of the control unit is indica
Initialization (Init)The selection of the submenu for the initialization of the event memoryand the permanent data.event memoryvariants + sequencesmac
8.5.4.4 Free contoursWith the button sewing automat 530 up to nine freely defined seamcontours can be created and sewn. The entry of the coordinates i
Determining the contour coordinatesWhen creating a seam contour every individual stitch has to be enteredin the control indicating its position in the
Create contourIn this menu the X- and Y-coordinates are entered for every individualstitch.append stitchparameter/endNote:In order to enter stitch ope
Submenu parameterSelection of the submenu for entering the contour parametersstd. rpmdist. xdist. yStandard rpm:Standard speedInput: 100 ... 2700 rpmD
Change contourstitch coordinrem.st.ins.st.append stitchparametersno.stitchno.st.av.Stitch coordinatesSelection of the submenu for altering the stitch
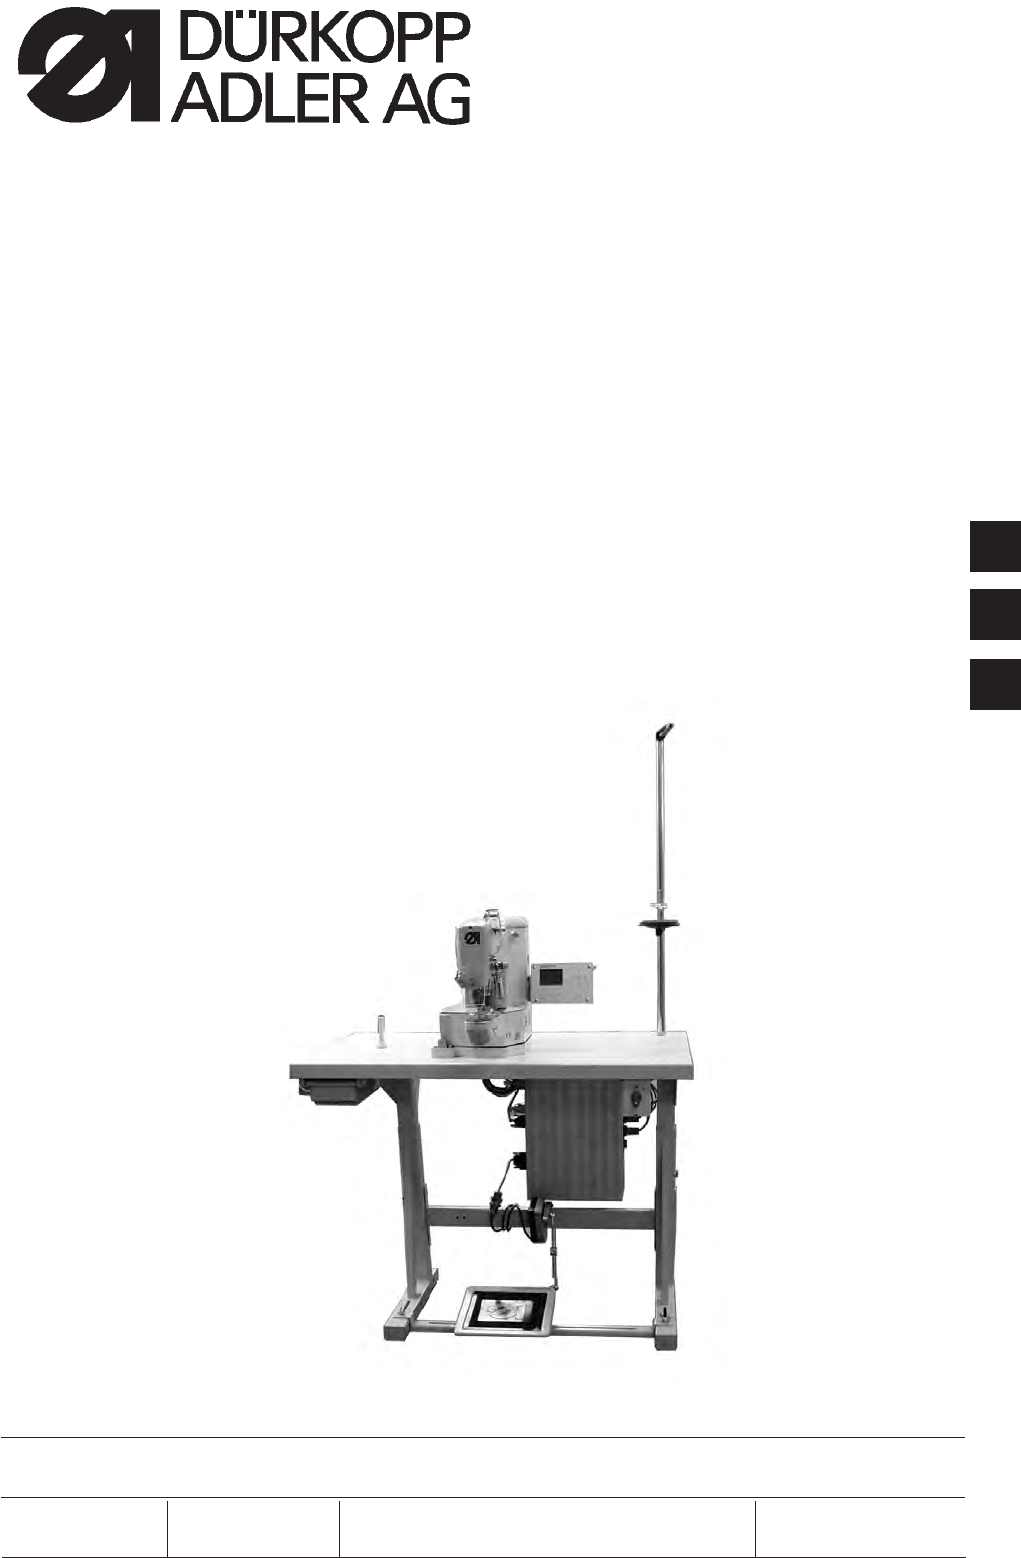
11. Description of productThe Dürkopp Adler 530 is a CNC double lockstitch automat for buttonsewing. The available button patterns are adjustable in l
–Select desired stitch with the keys “ñ”or“ò”.–Select stitch with the key “OK”.The submenu for altering a stitch coordinate appears.If a stitch operat
OperationNumber Description Note0 No stitch operation1 Intermediate trimming The intermediate trimming can beprogrammedupto10timeswithinacontour. Betw
Copy contour–Select the menu item “copy“ with the “ñ “or“ò“keys.–Actuate the “OK”key.–Select the desired sewing pattern number (1-50,91-99) withthe “ñ
8.5.4.5 Memory donglemachineuserservicefree contoursmemory dongleBy using the functions of this submenu, data can be transferred fromthe machine to th
Displaying the dongle contentsBoot dongleIf a boot dongle is inserted, information concerning the machineprogram will be displayed.classsubclassversio
Display of the memorized free seam contours(example)If no sewing pattern program or free seam contour is memorized, „—“ willappear, otherwise the corr
ContentsVia this menu item the contents of a memory dongle connected to thecontrol unit can be displayed.Free seam contours completelyVia this menu it
Memorizing data on the dongleHere program data (sewing pattern programs and sequences) andmachine parameters or all free seam contours can be saved fr
A window to confirm the selection will appear.–Actuate the“ï“ key (no), in order to cancel the transaction or the“ð“ key (yes), in order to start the
Error messagesNumber Name Possible cause Elimination4301Dongle missing No dongle insertedInsert dongle into control unit4302Dongle empty• No data save
2. Description of proper useClass 530 is an button sewing automat determined for processing lightto medium-weight material, i.e. fabrics made of texti
8.6 Error messagesIn case of an error in the control system or in the sewing patternprogram the display shows a corresponding symbol and an errornumbe
8.6.2 Application messagesPicto- Description Category Reaction/ Problem eliminationgramCapacity counter is “zero” Hint· Clamping foot can onlybe lower
Picto- Description Category Reaction/ Problem eliminationgramContour exceeds thework surface opening oftheclampingfootinX-directionWarning· No sewing
8.6.3 Machine errorsError Description Possible causes Troubleshootingcode1051 Sewing motor timeout · Cable to motor faulty· Reference switch faulty. S
Error Description Possible causes Troubleshootingcode2201 Step motor Y-axistimeout referencing· Cable to reference switchfaulty· Reference switch faul
Error Description Possible causes Troubleshootingcode33013320-33223330-3332334033413350-3351335333603361340034013403Error controlprocedure / Testproce
Error Description Possible causes Troubleshootingcode5804 Free Contours:Wrong checksum-NV-SRAM faulty-Failure-Check via Multitest,check the control-Sw
Error Description Possible causes Troubleshootingcode7701 Protocol error Internal error· Switch machine off and on again· Software update· Contact the
9. SewingOperating and function sequence when sewing:Sewing operation Operation/ ExplanationBefore the sewingstartStarting position - Pedal in resting
10. Maintenance10.1 Cleaning and checkingCaution: Danger of injury !Switch off main switch.The maintenance of the button sewing automat must only be c
174. Optional equipmentThe following optional equipment is available for the button sewingautomat 530:Order No. Optional equipment9822 51 002 6 Sewing
10.2 Oil lubricationCaution: Danger of injury !Oil can cause skin eruption.Avoid a longer contact with the skin.Wash yourself thoroughly after a conta
11. Standard sewing patternsNo. Stitch pattern Stitch Number of Standard size Standard sizerepartition connecting threads X-axis (mm) Y-axis (mm)16-61
No. Stitch pattern Stitch Number of Standard size Standard sizerepartition connecting threads X-axis (mm) Y-axis (mm)22 10 - 10 1 3,4 3,423 12 - 12 1
No. Stitch pattern Stitch Number of Standard size Standard sizerepartition connecting threads X-axis (mm) Y-axis (mm)44 4-4-4 - 3,4 3,445 4-4-4 - 3,4
12. Clamping feetClamping foot numberDimensions X x Y [mm]inner frame ofclamping footInner frame,rectangularSpecified standardsewing pattern numberAll
19313. Numbering of menu itemsParameter English (displayed on the screen) English (meaning)0off/aoff/a1on/bon/bD01yesyesD02nonoD03canccancelD04 okOKQ0
Parameter English (displayed on the screen) English (meaning)T1.3.6.7 output alloc.output allocationT1.3.6.8 l.ta cfslong ta clamp foot solenoidT1.4 t
Parameter English (displayed on the screen) English (meaning)T4.1.7 append stitchappend stitchT4.1.8 parameterparameterT4.1.8.1 std.rpmstandard speedT
Parameter English (displayed on the screen) English (meaning)W05 EMERGENCY-OFFEMERGENCY-OFFW06 SERIOUS ERRORSERIOUS ERRORW07 NOTENOTEW08 INTERNAL ERRO
Verwandte Produkte und Handbücher für Nähmaschinen DURKOPP ADLER 530
 (77 Seiten)
(80 Seiten)
(102 Seiten)
(77 Seiten)
(80 Seiten)
(102 Seiten)
 (51 Seiten)
(18 Seiten)
(51 Seiten)
(18 Seiten)
 (28 Seiten) (36 Seiten)
 (2 Seiten)
© 2020, manymanuals.de. Alle Rechte vorbehalten. | 1.138 s |
 Manymanuals.com
 Manymanuals.de
 Manymanuals.fr
 Manymanuals.it
 Manymanuals.pl
 Manymanuals.cz
 Manymanuals.es
 Manymanuals-pt.com
Kommentare zu diesen Handbüchern